Here's a few pictures to show you how the plagueclaw is coming along, now with a few coats of pain and nearly finished and ready for the tabletop. A few things are left to remain such as some more work on the plaguemonk crew, and the "standard" as well as a few miscellaneous details that need touching up here and there. I decided to go with the orange rust instead of verdigris to go along with the theme throughout the army, it also adds a little more colour where there are plenty of greens and greeny blues already involved in this piece. Enjoy!
Showing posts with label Conversion. Show all posts
Friday, July 23, 2010
Monday, July 19, 2010
Scratch Built Treekin Model
After some work i've managed to piece it together, a rather large and natural looking Treekin model. The majority of this model is actually made with twigs and dead pieces of wood i gathered, all super glued together, with a sculpted face and details made of "green stuff", and talons made of plastic roughly cut with an exacto blade. Spanish moss, slate and various sizes of sand and gravel were added to make the base and model feel more overgrown. Here's some pictures!
The model was spray varnished to seal the wood and vine pieces. 5 more to go :) !
Sunday, July 18, 2010
Plagueclaw Catapult Conversion
The conversion was inspired heavily by another conversion that was found on the internet using the Orc and Goblin's Rock Lobba model as a basis and an assortment of pieces from the Screaming Bell and Plague Monk kits. Here' how it turned out.
This was a relatively simple and effective way i find to make a plague claw catapult using some spare bits and a the rock lobba model. Please feel free to leave any questions or comments.
Sunday, July 4, 2010
Grey Seer on Rat Bone Ogre
Thursday, May 20, 2010
Plague Tower: Progress Log 5 (Casting of the Front)
So here are the first pictures of the plague tower shot with actual scenery, I thought with the addition of the front panel it was time to add some colour around the model, to get a look at what exactly it might look like on the playing field.
There is still a great deal of work left to go into this model however it's shaping up nicely, I'm waiting for some green stuff i ordered to come in the mail (with the help of the ever reliable Amy) before i get to work on the hardcore details and resurfacing of the front.
The front panel was originally sculpted in plasticine on a cardboard backing to get the general shape of what you see here. the original was then cast in plaster to make a mold from which the plasticine was removed. The front panel was then cast in resin from the plaster mold. After the resin had cured over night the plaster mold was broken off the resin positive, leaving a archaeological dig worth of cleaning to do to remove the left over plaster stuck to the resin. The cleaning still continues!
Here is a side view with models placed on the walkways for scale. Note that the sides of the front panel still need to be treated with green stuff to get that stretched skin look. Also of note here are the wheels on this side which received a wooden texture look.
For a greater idea of scale of this thing, i've set it next to the imperial bastion.
There is still a great deal of work left to go into this model however it's shaping up nicely, I'm waiting for some green stuff i ordered to come in the mail (with the help of the ever reliable Amy) before i get to work on the hardcore details and resurfacing of the front.
Tuesday, May 18, 2010
Saturday, May 15, 2010
Plague Tower: Progress Log 3
So, a lot has progressed since last i posted pictures, primarily the siding has been completed on both sides of the tank, a whole ton of rivets have been glued into place and some conveniently sized pieces of tubing have also been adhered to the front. Things are really starting to take shape.
Another major detail that was completed was the embelishment of the side "pus tank" made from the living nature water bottle, bands have been glued around it to make it look more industrial and less little critter, and an access hatch has been glued onto the top.
Now moving to the back, you can see the detail of the rear upper hatch, which now has been added, detailing on that piece is a work in progress.
Here's an overall view of the rough plague mortar assembly...
and it's loading hatch...
overall the front looks really bland and there is still a ton of work left to do on this model, but each day is one step closer.
Thursday, May 13, 2010
Plague Tower: Progress Log 2
After some further design work, i've decided what to do with the other side of this monsterous construct. First lets take a look at the back. I've installed some rhino doors that were extra from a predator i once bought.
after some work on the side paneling, i've finally managed to finish the wood planks along the sides, as well as adding some more armour plates for the hut supports which i will install later.
Here is a picture of the fitting for the "Pus Tank" that will occupy the majority of the other side of the model. This was actually made by heating up a metal pipe and running it through the center of both circular disks.
And finally a picture with the "pus tank" installed to give an idea of the overall look. The "pus tank" is made of a small "living habitat" small animal water bottle that i had hanging around collecting dust.
Plague Tower: Progress Log
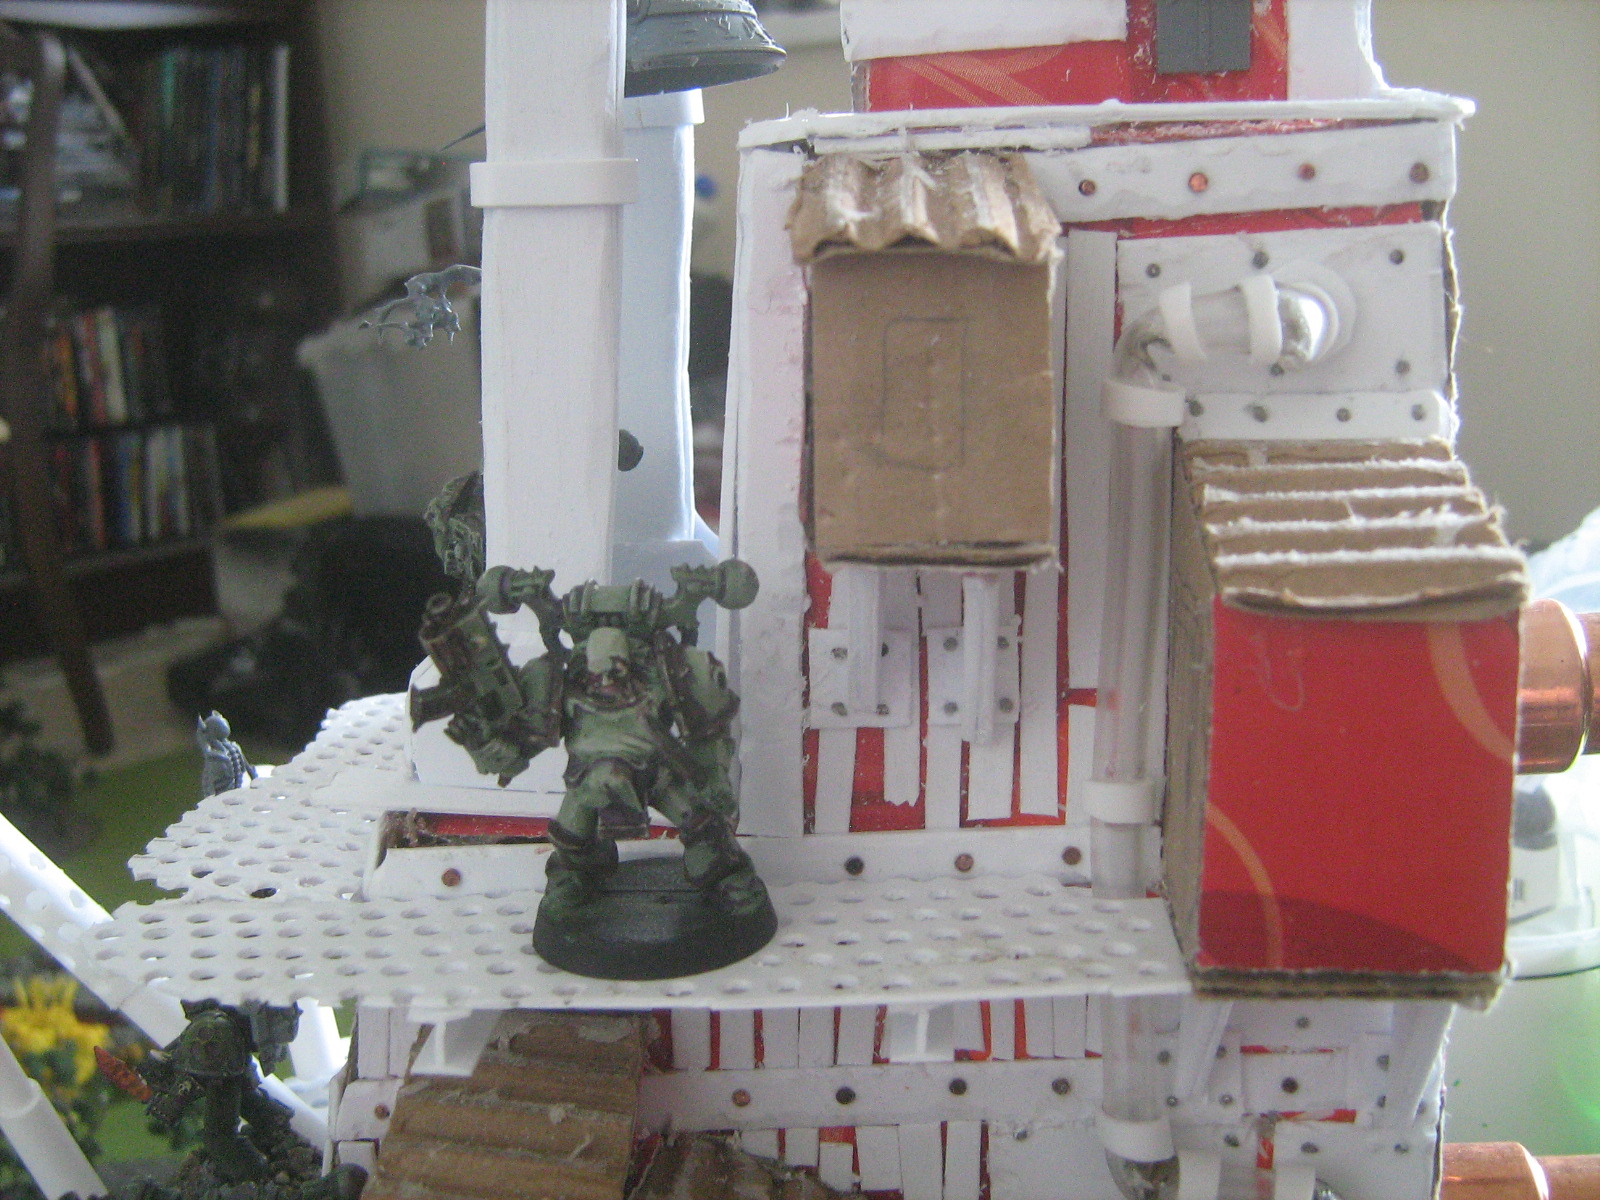
Back again with some updates on exactly how this plague tower is coming together. First i decided to finish bulking out the frame with the "hut" protrusions that are found on the exterior of the tower. I wanted to avoid any unnessessary extra work, specifically putting these things on after i complete the siding, so it's best to get them on and over with.
Here's a second look at the shape of the structure.
Using a thick plastic card i've outlined the various areas on the model with the large metal strips that can be found in the concept sketch, these just break up the model visually.
This stage was the beginning of what will be the fiddly work on this project, i've cut out pannels of normal thickness plasticard and glued it to the sides in a mixed up fashion as to make the thing look a little ramshackle, once again a lot of this is done to visually break up the model. All the areas that are still bare will be covered in the wooden looking siding instead the armour plates will only cover the front of the model, making it look more bulky towards the front. You can also stee that i've started removing the top of the card that is to bee the corrugated roofing.
Well thats it for now till i get some more done.
Here's a second look at the shape of the structure.
Using a thick plastic card i've outlined the various areas on the model with the large metal strips that can be found in the concept sketch, these just break up the model visually.
This stage was the beginning of what will be the fiddly work on this project, i've cut out pannels of normal thickness plasticard and glued it to the sides in a mixed up fashion as to make the thing look a little ramshackle, once again a lot of this is done to visually break up the model. All the areas that are still bare will be covered in the wooden looking siding instead the armour plates will only cover the front of the model, making it look more bulky towards the front. You can also stee that i've started removing the top of the card that is to bee the corrugated roofing.
Here i've gone through the meticulous task of putting rivets on the sides of each armour plate, i've also started with putting the wooden siding on the areas that are still bare. It's slowly coming along.
Well thats it for now till i get some more done.
Subscribe to:
Posts (Atom)